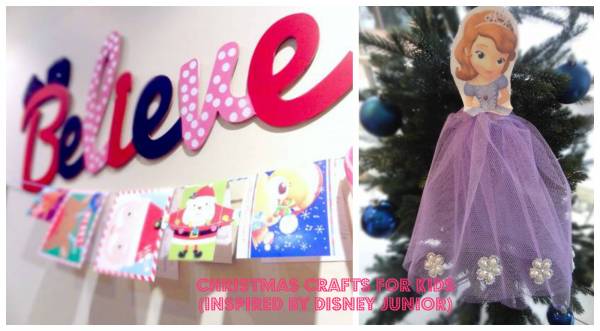
 | With a little inspiration from the Disney Junior characters, we’re celebrating Christmas with some of our favourite bloggers, creating magical Christmas activities for you and your little one to make and share with your family. Disney Junior The Channel is available in all Foxtel subscribing homes, channel 709. |
Today, we have two craft ideas inspired by our kids favourite characters out of Disney Junior!
The Mickey and Minnie Believe Sign
Mickey and Minnie like to hang out at the ClubHouse on Disney Junior these days, but Mickey has been hanging out in my heart for years. There is just something magical about him and I can’t let go. We decided we needed some Christmas Word art to go on our wall this Christmas. We came across this Kaiser Believe Wooden cut-out unexpectedly and decided it was perfect for us. This year my children are only around 5% sure Santa is real and we had just finished a conversation about Santa’s existence. I told them if you don’t believe then you don’t receive and we all had a giggle and decided this was perfect.
We are not particularly Christmussy when it comes to Christmas decorations. We are the type of people who hang purple decorations and put random things on the tree. We decided to go with Minnie Mouse and Mickey Mouse as next year we hope to visit Disneyland. I guess this word art is kind of a “put it out there wish list” too.
(At least daddy might get the hint). As with all my craft projects the kids got involved and we decided to paint it in the non traditional Disney Junior colours (Minnie’s dress is pink not red).
Here is what you will need:
Kaiser Believe Cut Out Word
Small sticker dots
Red, black, white & Pink paints
Black craft foam, board or felt.
Start by painting the base for your white dotted letters.
Paint the remaining letters in your desired color combination.
Next, unless you can paint perfect dots, we used stickers. It was really tactile for the kids to put them in place. They really enjoyed removing them to reveal the white dots after we applied the pink.
Using a pink paint paint over the dots and allow it to become touch dry before gently removing the stickers.
Create the Iconic Mickey Mouse ears from the black foam or board and attach the the letters. We popped ours on the B but you could add smaller ones on to other letters if you liked.
And there you have it:
Sofia the First Tree Decoration
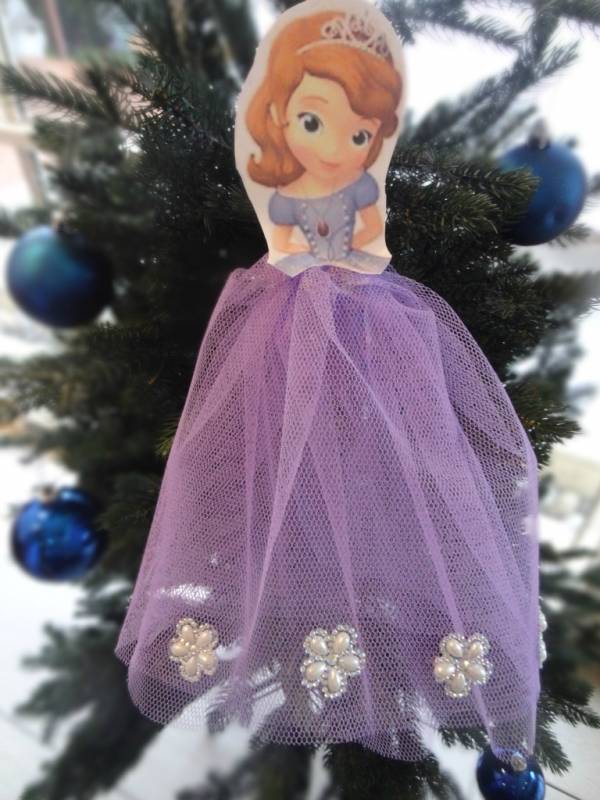
Sofia the First is one of my favourite princesses of all times. Did you know that this young lady, only became a princess after her mother re-married. This young lady came from nothing to become the most humble member of royalty. She is the type of princess I want my daughter to grow up watching and admiring.
We are not a religious family, so hanging Angels on our Christmas tree feels a little hypocritical but hanging childhood heros? Now that’s something that sits comfortably with me.
My Children love making Christmas decorations. It is as if it is the only time of year that they can craft with one set purpose – To decorate the Christmas tree. The only problem is, I can’t part with each year’s creation. For me it is a memento or a keepsake from their childhood. I have the salt dough hand prints from when they thought squishy things were fun, I have the threaded pasta ornaments from the year I wanted to teach them extra fine motor skills. I even have decorations that a geometrical shapes made from craft sticks? Why? Because one thing I have learnt as a mum and as a craft teacher is that kids learn best when they are having fun.
This Sofia the First Christmas tree decoration was so easy to make. It would also be a great little class gift for school friends.
What you will need:
90 cm x 20 cm of purple tulle
Craft Glue
Rubber band
Printout of Sofia’s Head
Ribbon or cord for hanging
Pear beaded stickers or sequins (optional)
Fold your tulle in half length ways, keep the fold towards the bottom. Fold or bunch the tulle up to create the dress and secure with a rubber band. We used a purple one just so that it matched the colour theme at the back.
You will need to print and cut out the Sofia head (Image below)
Glue this over the rubber band and fluff out the tulle.We were lucky enough to find beaded daisy’s at Spotlight which were almost identical to Sofia the First’s actual dress. These stickers were adhesive but we added our own glue so they would last a few more years. Finish off by adding a string to hang.
And you are done!
How easy and fun was this? What Disney Junior character would your kids use to create their own perfect wreath? Join them at @disneyjunioraunz and use #DJMagical Moments.
This post is part of a Nuffnang native advertising series.

With a little inspiration from the Disney Junior characters, we’re celebrating Christmas with some of our favourite bloggers, creating magical Christmas activities for you and your little one to make and share with your family.
Disney Junior The Channel is available in all Foxtel subscribing homes, channel 709.




Leave a Reply